Friday, March 30, 2012

5 Unique Anniversary Gifts Ideas

Hi Guys.  Spring is in the air, and that has me thinking about Anniversaries.  I don't know why, since they can happen any time of the year.  But whatever, I am.   :-)

Anyway, for today I decided to send out a list of some really cool anniversary gifts that I have found online.  Plus some that my customers have made using our tutorials.  Why not post a comment with your favorite anniversary gifts below?


1. Personalized Anniversary Cross - Celebrate your enduring love with this classic and attractive personalized cross. I found this at Abernook.com for $32.


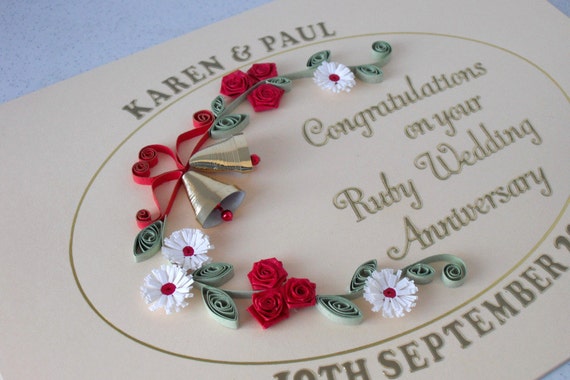
2.  Anniversary Card Quilled Flowers- I found this on Etsy.com. A very original and exquisite handmade greeting card to celebrate a milestone anniversary. I love the origami and quilling technique used in this card. Awesome job and great creativity!


3. Anniversary  Throw Pillow. Also from Zazzle.com, you can use your favorite image or photo to create an elegant anniversary pillow keepsake like the photo below.  


4. Elegant Anniversary Postage. Put a personal touch in your mail with this elegant Anniversary Postage. This is available at Zazzle.com, it is selling for $22 per sheet. 


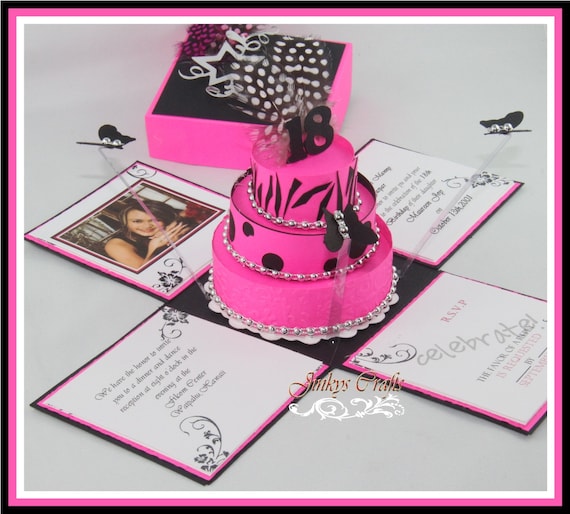
5. Anniversary Exploding Box - This is a project of Cecilia Montanes, she is one of my clients who purchased my Exploding Box w/ 3-Tier Cake PDF Tutorial. She made this Anniversary Exploding Box as a gift for her husband.

I love how she turned this Exploding Box into a fantastic gift. Those die-cut butterflies are so lovely. I am known for turning  Exploding Box Templates into Exploding Box Invitations. But with what she did shows the versatility of this tutorial. 


I just wish that Cecilia has a blog I can link this post to. She said she wants to have a blog someday. For those who want to know how to create a blog. I have created a step-by-step tutorial on How to Create A Blog For Free and it is available on my website


Thanks for stopping by. Hope these ideas inspires you today.

Wednesday, March 28, 2012

5 Favorite Fabric & Ribbon Manipulation Project

Hello everyone! Hope everyone is having a great day! I have been seeing a lot of beautiful and vibrant fabric flowers and ribbon manipulation projects in Pinterest recently. I decided to share with you my 5 Favorite projects I made using fabrics and ribbons.


5 Favorite Fabric & Ribbon Manipulation Projects by: Jinky's Crafts

1. Kanzashi Heart Wreath - I created this project for MayArts DT Challenge. I consider this as one of my top favorites because this project gave me the chance to be one of the talented MayArts Ribbons Designers. 


2. Ribbon Art Canvas - This is a project I created to showcase MayArts Ribbons & Stampendous Big Floral Peony Stamps. Great project for home decor. 

3. Kanzashi Fabric Flower -  I made this colorful fabric flower jewelry for my sister-in-law. There should be free tutorials on how to make the Yo-yo and Kanzashi Flower if you click the link. 

Kanzashi Flower Handmade Jewelry

Tsumami Kanzashi Flower + 2-Way Cube Gift Box

4. Gathered Ribbon Flower  - This gathered flower is so easy to make. Just make a straight stitch on one side of the ribbon and then gather the stitch and form into a flower. 


5.  Spider Web Ribbon Flower technique - I enjoyed making this Framed Ribbon Flowers project. I learned few ribbon manipulation techniques in making this beautiful ribbon flowers. There should be a free tutorial for the Spider Web Ribbon Flower technique on my linked post. 


r
Spider Web Ribbon Flower + Exploding Box


So those are my 5 Favorite flower manipulation projects. Please let me know your favorites too, or if you have a flower tutorials you want to share..just let me know,  or leave a comment. Thanks for stopping by today!

Sunday, March 25, 2012

Check Out Our Client's Exploding Boxes Version

Happy Sunday everyone! Hope you are all having a great weekend. As you know, I made a call out  yesterday to everyone who downloaded Jinky's Crafts Exploding Box PDF Tutorial to share their projects by emailing me their photos. Last night, Lynn Allen emailed me photos of her Wedding Shower & Birthday Exploding Boxes photos. I promised her that I have to share it with you today. So here is her take on my Exploding Box PDF Tutorial.


I love her version of the Exploding Box. Her choices of colors are really great. Her 3D Flower was also included in the tutorial she downloaded. All the die-cuts she put to decorate the box are all pretty! She really did an excellent job! Lot of work but I think you will agree, it paid off!


I love the Teal color and coordinating designer cardstocks she used here. And the die cut shoes is so pretty! Every birthday girl would be ecstatic to received a Handmade Birthday 3D Box as especial as this one. 

I created also something like that last year for my Quinceanera Exploding Box Invitation and Quinceañera Recordatorios I hope these photos inspired you and hope you are going to share also your version of the Exploding Box Tutorial. Please email me and let us all get to know each other here.

Quinceañera Exploding Box Invitation & Recordatorios

Quinceañera Exploding Box Invitation & Recordatorios 

Thank you Lynn Allen for sharing your photos and for inspiring us today! Much appreciated!

Let us know what kind design of Exploding Box you are wanting to see in the future..LIKE, SHARE & PIN this post if you think it will inspire others. Enjoy the rest of your weekend!


Saturday, March 24, 2012

Wedding & 18th Birthday Exploding Box Invitations

Hello everyone! I hope you are all enjoying your Saturday morning! I just wanted to share some Exploding Boxes project photos from our fellow Crafter's.

First, is the 18th Birthday Exploding Boxes Invitations by Zenaida Perez all the way from Saipan, Northern Mariana Islands.  She initially approached me to make a custom 18th Birthday Exploding Box Invitation for her, but sadly I had to say no because there was too little notice for shipping. I advised her to purchase my Exploding Box PDF Tutorials so she could just do it herself.


When she sent me these photos, I was so impressed! These Cream & Red Color combo Exploding Boxes are amazing! They look so gorgeous! She really did a great job and did justice to my tutorial. I am so proud of her. 


I love the mini flowers she used and the red satin ribbon trimming on the cake! It perfect! Thanks Zenaida for sharing these photos. Now, she's waiting for a Flat Pop-Up Card by Jinky'sCrafts. I told her, I might come up with new design next month. I am super busy with all the custom orders I have to fill. So ladies, be patient with me.


This Wedding Exploding Box, is from Jan Bennett. Remember, she was our latest guest blogger who made the Teapot Exploding Box project. I love the layering she did here and those die cut hearts are too die for. Love love it. 


Ok, I hope these Exploding Box photos inspired you to create a 3-Dimensional project this weekend. Remember, you are welcome to email me your photos so I can post them here. Happy weekend everyone!


Friday, March 23, 2012

How To Make DIY Spring Ribbon Topiary


Hello everyone!  I am excited to share with you today my Spring inspired Ribbon Topiary project. 


I really had fun doing this project. It is very simple to make yet very satisfying. The beautiful colored MayArts  organza ribbons  blended perfectly together. This can be a great gift,centerpiece or homedecor just in time for spring season. You can also use the same idea or technique on your next party event/occasion.  


How To Make A DIY Spring Ribbon Topiary

Material/Supplies Used: 
  • foam ball 
  • May Arts Ribbons (349-47, 349-46, 349-22, 349-27, 349-28, 363-10
  • Wine Cork  ( you can use Wooden Dowel )
  • hot glue  ( you can use straight pins )
  • newspapers to secure my Wine Cork Dowel

Instructions:
  • Cut your organza ribbons into 4" to 5" strips.
  • Hot glue loops/curled ribbons into the foam ball until it's completely covered. (You can use safety pins).
  • Make wine cork dowel, just hot glue wine cork together then wrap some Burlap ribbon where the  corks are connected. 
  • Put your floral foam into your topiary base of your choice.
  • Add some old newspapers to support the dowel.
  • And also add more ribbons around the bottom of my Dowel to cover the newspapers. 
  • Decorate. Done!

That's it my friends, Thanks for stopping by and hope I inspire you today!