Sunday, May 29, 2011

Kanzashi Heart Wreath - MayArts Final DT Challenge Entry


This will be at the top of the post until May 31st. 
Be sure to scroll down.


Hey Folks, the MayArts DT Challenge ain't over yet. If you remember, my Framed Ribbon Spring Flowers was selected in the initial round of Finalist for the Design Team Call for MayArts. This Kanzashi Heart Wreath is my entry to the last round Challenge. This time there was no theme.  I hope you like my entry and support me by voting for me. Stay tuned for MayArts official post for the FINAL ROUND entries.


I decided to make this Kanzashi Heart Wreath because I love the art of folding. The Kanzashi term- in the English-speaking world, refers to the folded-fabric-petal flower that traditionally adorned the Tsumami Kanzashi (folded hair ornament). These are created by Japanese artisans from tiny squares of silk, usually 1"- 4". It is folded into petals using origami techniques.


 I really like how the twig (wrapped with velvet MayArts ribbon) gives my butterfly a nice place to rest.  I am actually amazed with all the different types of Kanzashi folding and Kanzashi flowers. In Japan, the seasons dictate which kind of hair ornament is worn. It is beautiful! Please scroll down for the  Basic Tutorial for Rounded Kanzashi Petal.


One of the traditional and main supplies used in Kanzashi flower construction is rice glue. I deviated from the traditional way by hand-stitching instead. This flower petal folding requires a lot of patience, but it is worth it.  I love how my Kanzashi flowers and  Kanzashi Falls came together. The summer colours are bright and cheery. This Kanzashi Heart Wreath will be a great home decor item for summer time.  And by using the tutorial provided below you can make hair accesories like a barrette, hair clip, necklace, brooch and many more..You can see some of my Kanzashi projects here.


All the ribbons used on this Challenge project were compliments of MayArts.


Yellow Flower: HA27
Red Flower: HA14
Pink Flower: HA17
Leaves: KK16
Falls Cord: 378-16
Twig: 389-18-46
Wreath Handle- AGG14


Click Image to enlarge.


Kanzashi Petal Flower Tutorial


Basic Supplies: 

3" x 3" fabrics (6-10 pieces,any size you want)
Scissor
Needle
Thread
Pins

Click image  to enlarge .


Framed Ribbon Spring Flowers -  MayArts DT Challenge 1st Round Entry


Thank you for stopping by. Hope you try this technique sometime. Wish me luck and vote for me!  Hope I will win the MayArts DT challenge.

Saturday, May 21, 2011

Treat Box + Treat Bag + Card ( 3-IN-ONE)


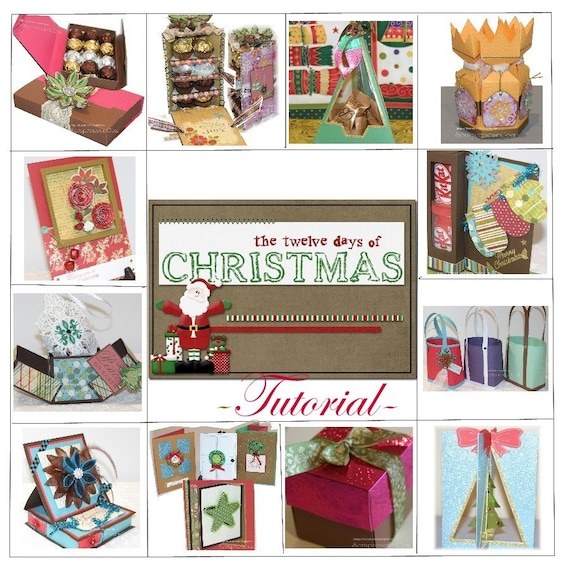
This Tutorial was included on Jinky's Crafts 12 Days of Christmas Crafts 
(Revised 1st Edition)
This will be at the top of the post until May 31st. 
Be sure to scroll down.

Hello everyone! I hope you are enjoying your weekend and you have some time to do crafts. Today is my scheduled blog post for Crafter's Companion and I have a very cool project I would like to share with you. It is a 3-IN-ONE project that only uses ONE 12" x 12" piece of cardstock + embellishments. Also, I will be sharing a Pin-Wheel Rosette Tutorial, using the newly launched Boxer boards for the Ultimate Crafter's Companion Tool. I have made a Pin Wheel Tutorial in the past using the Ultimate Tool. I was happy with the Ultimate Tool before, but I was hoping they would come up with some new boards with equal interval grooves. So, I was ecstatic when I learned that they would be releasing 2 new boards - The Boxer and Envelobox Creator. Yay!


My project is a combination of a Treat Box + Treat Bag + Card in one. I discovered this by accident. I made a mistake in cutting one of my cardstocks and didn't want to throw it away.  So I came up with the idea of making a Treat Bag and combining it with the Treat Box and Card. It worked! Don't you just love it when you try to cover a mistake and you come up with a totally unexpected and awesome end result. I love it! I love making boxes, and not only ordinary boxes. I always want to challenge myself to think outside the box (excuse the pun), and to experiment. The goal? To make an ordinary box, extraordinary. Having the right tool is the key. And if you love making perfect boxes like me, the Crafter's Companion Ultimate Tool + The BOXER and ENVELOBOX boards should be on your MUST HAVE list.


I adorned my Treat Box with 3D Die-cut Decoupage and Rub-Ons stickers from the Fairyopolis Card Making Kit. I filled it with Dove Chocolates and some Mini Rose flowers. Sometimes every little detail counts.
I then put some Ghirardelli chocolates in a clear plastic Treat Bag. I tied a ribbon as a handle  between the Card and the Treat Box. 
I decorated my Card with Pin-Wheel Rosettes that I made with the new BOXER board. Please see below for the tutorial on how I made them. 

PIN WHEEL ROSETTE TUTORIAL


Check my Jinky's Crafts Website for more Pin Wheel Rosette Projects

Thank you for stopping by. If you like what you see, please leave me a COMMENT. I LOVE reading COMMENTS! 


Thursday, May 19, 2011

Jinky's Crafts 1st Anniversary Blog Candy

Hi everyone and welcome to Jinky's Crafts 1st Anniversary celebration Blog Candy. I can not believe it has been a year. I have learned so much since I started blogging. I have had a lot of fun and met cool Crafty ladies along the way. To all my followers and subscribers and to Crafter's Companion USA who first trusted me to be part of their awesome Design Team, thank you from the bottom of my heart.

In celebration of Jinky's Crafts 1st year Anniversary, I have prepared a Blog Candy contest for my dear followers, subscribers, guests and FB Fans.

Cool prizes up for grabs!

Third Prize :  Fabric Flower Tutorial 

Note( If you had already purchased these tutorials, you can check my ETSY SHOP and choose one Fabric  Flower Tutorial  as your prize).      


Note( If you had already purchased these tutorials, you can check my ETSY SHOP and choose one Tutorial  as your prize).       


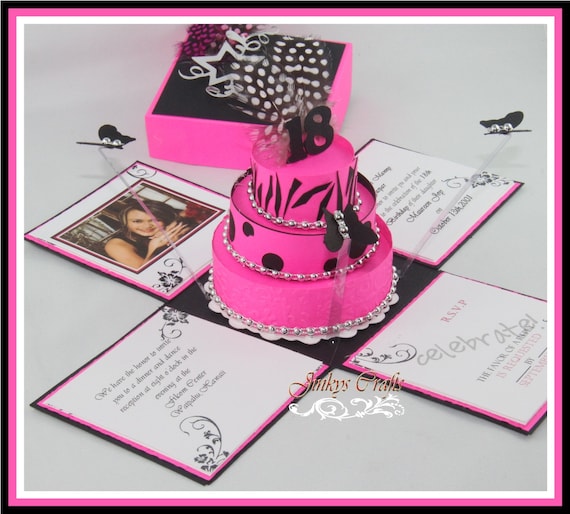
First Prize: Pop-Up Purse w/ 3-Tier Cake Tutorial + Exploding Box Invitation w/ 3-Tier Cake.

           Note: ( If you had already purchased these tutorials, you can check my ETSY SHOP and choose 2  Tutorials as your prize).         


To be eligible to win ( please do any or all of the following )

1.   FIRST CHANCE to win - Follow this blog (select the "Follow" button to the top left) .

2.   SECOND CHANCE to win - Leave a comment under this post by May 31st, about how you would use these projects by May 31st.

3.   THIRD CHANCE to win!! Tweet, Send an Email to Friends, Blog about or Post on your Facebook about this giveaway.  (Just let us know you’ve done this by leaving another comment below this post with a link to your Twitter/Facebook post, Blog entry, or copy the email message you sent to your friends.)


The winner will be announced on Week1 of June.


Thank you for stopping by. Hope you have time to play along! 

Tuesday, May 10, 2011

Pop-Up Purse Invitation


Why are invitation important? A lot of people take invitations for granted. They have this misunderstanding  that  it is not an important part in planning a party because it is usually gets thrown away after the event. What most people do not know is, invitations sets the tone for your event/party. If you want to give your guest an impression and build excitement for what they should expect from the event, you have to pay attention to your party invitations. You build a good impression before the party not after the party.


My newest designed Pop-Up Purse Invitation is an example of setting a tone to your party with style. If your guests receive this stylish party invite, you will give them an idea of what theme you are going to have at your party. Your guests will be elated to receive a party invitation that is well-thought and well-crafted like this Pop-Up Purse Invite.


So how did I come up with this design? Since I have been designing Exploding Boxes with 3-Tier Cake invitations recently. I had this idea to combine all the techniques I knew and created this Pop-Up Purse Invitation. As you know, I love to make 3 dimensional projects. So this one is no exception.

When your party guests receive these invites, they might think it is just a Purse, but when they open it, a 3-Tier Cake will Pop-Up! How cool is that?

 I love the Hot Pink and Black combination. I am satisfied and happy with the final look of my 3-tier Paper Cake and the Eiffel Tower is a perfect addition to my design. This Pop-Up Purse with 3-Tier Cake Invitation is perfect for a Bridal Shower party, Sweet 16th, Quiceañera, 18th Birthday or any other party event.


The complete Pop-Up Purse with 3-Tier Cake is now available on my ETSY shop.

Thanks a lot for stopping by. Please leave me a comment below, I love reading comments!


Monday, May 9, 2011

Turquoise Blue and Black Exploding Invitation Box


Happy Monday everyone! I hope you all had  a wonderful Mother's Day weekend. 

This past weekend, one of my client who bought my Exploding Invitation Box Tutorial asked me if I can help her with the supplies in making Exploding Box. She said, she like the Turquoise Blue and black combination. So, here's the design I created for that color combination - Turquoise Blue and Black Exploding Invitation Box!


I always love Turquoise blue and black. Who doesn't? I think the combination of this 2 colors looks really great. I just finished 2 orders of this Quinceañera Exploding Box invitations. The first one had a Black and Red combination and the last one was Burgundy and Black. They were both beautiful. 


This Invitation Exploding box is a unique way to send out a message of your upcoming party. It is great for Quinceañera, Sweet16, 18th Birthday, Bridal Shower, Wedding, Anniversary or any party occasion. I have a tutorial on how to make this unique party box on my Etsy Shop. The tutorial is not limited for invitation purposes. This Exploding box can also be used as your scrapbook pages, gift box or gift favors.


Who would not love to attend a party after receiving an invitation as detailed as this one?

Thursday, May 5, 2011

Altered Clipboard & Easel Card w/ Paint Fusion

Congratulations to Amber S for winning my Crafter's Companion Blog Candy last month. Please provide me your complete name and snail mail address so I can send out your prize. Thanks! 


Hello everyone! It's the first Thursday of the month and I have some very exciting news to share with you. This is my scheduled post for Crafter's Companion blog and I am very excited to let you know that the most awaited Paint Fusion products by Sheena Douglas are now available on the Crafter's Companion USA site!


The Paint Fusion products include:
  • Rubber stamps - Simply Sweet, Berries, Daisies, Rosebud, Sweet Pea and Poppies
  • Laminated practice sheet + four page inspirational samples inserts
  • Paint Fusion DVD - over 3 hours long of step-by-step instructions to help you get started
  • Die-cut mount board shapes
  • Acrylic paint sets
  • High quality Royal and Langnickel Paint Brushes
It does not matter if you are a beginner, intermediate or advanced crafter, the Paint Fusion technique will help you achieve a stunning result.


Honestly, I am a newbie to painting. I was terrified at first, but after watching the Paint Fusion DVD,  I finally developed the courage to try. The practice sheets + the rubber stamps + the step-by-step tutorials on the DVD helped me to get started. Sheena Douglas made everything look so simple and achievable.
 

For my first two Paint Projects, I made an altered clipboard and Easel Card for Mother's Day. I used the Sweet Pea Stamps and Crackle technique for my background.

Mother's Day Easel Card with Paint Fusion

Altered Clipboard with Paint Fusion

I also gold embossed some swirl from the Sweet Pea Stamp set and painted a flower bud on vellum to create a 3D- effect on my Paint Fusion project. I love how it all came together. 


I can not believe I was able to create this piece of art considering I have never painted before. Give this a try and I know you will be painting like a pro in no time.

Monday, May 2, 2011

Mother's Day Challenge @ Crafter's Companion


I can't believe it is already May! Time flies so fast! Wow, April just flew by!

I have some exciting news to share with you today.

We have a new Challenge for the month of May @ Crafter's Companion. The theme for the challenge is Mother's Day. Create a project using Crafter's Companion stamps and link it over to the Crafter's Companion Challenge blog.

What's the prize?


This huge package includes:
The Boxer
Envelobox Creator
Ultimate Advanced Techniques DVD
Total Retail : $100.80

Here's the inspiration I made for the Crafter's Companion Challenge blog. I made a Mother's Day Pop-Up card from the Fairyopolis Complete Cardmaking kit. I just love this cardmaking kit because everything you need to make a beautiful card is already included in the package.


Hope this 3D Card inspires you. Check out the Crafter's Companion Challenge blog for more inspiration made by our Design Team. 

Thanks for stopping by today and I can not wait to see what you come up with for this month's Challenge.