Showing posts with label Cards. Show all posts

Wednesday, July 6, 2011

Sunflower Theme Wedding Invitations

Japanese Style Box + Bi-Fold Sunflower Wedding Invitations
Happy Thursday Everyone! One more day, before the latest Paint Fusion launch. Today, I am excited to share with you a project I made using the Sheena Douglas Paint Fusion Sunflower Stamps set. Since it is summer time and everyone is enjoying the season, it inspired me to create this Handmade Sunflower Theme Wedding Invitation. Sunflower Theme Invitations radiate sunshine and happiness and nothing brings cheer and joy more than a Sunflower. 
Japanese Box - Open
Bi-Fold Sunflower Invitation- Closed
I had loads of fun creating this Bi-fold Wedding Invitation and Japanese Style Box. The main invitation, containing the important information (Wedding Date, Place, Bride and Groom, etc) is placed at the center. The Directions/Maps + RSVP + Reception cards are placed on the side panel or pocket.
Pocket - Fold Wedding Invitation - Open
I created a paper belly band to keep the Bi-Fold invitation card closed and a ribbon belly band to keep the box closed. My pocket fold invitation and Japanese Style box were decorated with coordinating ribbons and Sunflowers cut-out that I hand-painted using the Sheena Douglas Paint Fusion Sunflower Stamps set. I then layered my Sunflower Cut-out using the Double Adhesive Sided Foam Squares to get the 3D effect I want. To achieve a perfect folds and clean lines for my Japanese Style Box and Pocket-Fold Card, I used The Boxer & Envelobox Creator  Ultimate Tool. 
Japanese Style Box- Closed
Sunflower Event theme makes a bold statement. You can use this idea in making your birthday invitations, Quinceanera or Sweet 16th invites, the possibilities  are endless. Suggest this idea to a friend or family. It's fun and easy to make. 
Thanks a lot for stopping by. I hope you like my projects and that I inspired you today! 


Thursday, June 16, 2011

Window Card + Envelobox Hand Bag + Vellum 3D Flowers Tutorial


Hello everyone!  I am back with another 3D project. Today, I will be sharing not one but three projects. So brace yourself, I am warning you - there are lots of photos! You better grab a cup of coffee. LOL! Yes, today I will be sharing with you the Humphrey Window Card + the Envelobox Hand Bag + a Painted Vellum 3D Flower Tutorial.

Yes Friends, The Humphrey's are coming to Crafter's Companion USA! These cute little elephant  stamp sets are sooo darn cute! I forgot how much I love stamping! I used the "Flowers For You" on my Window Card, where Humphrey is carrying a huge bouquet of flowers. I just love it! This new set of stamps will be available on June 23rd on the Crafter's Companion website. Make sure not to miss the launch date!


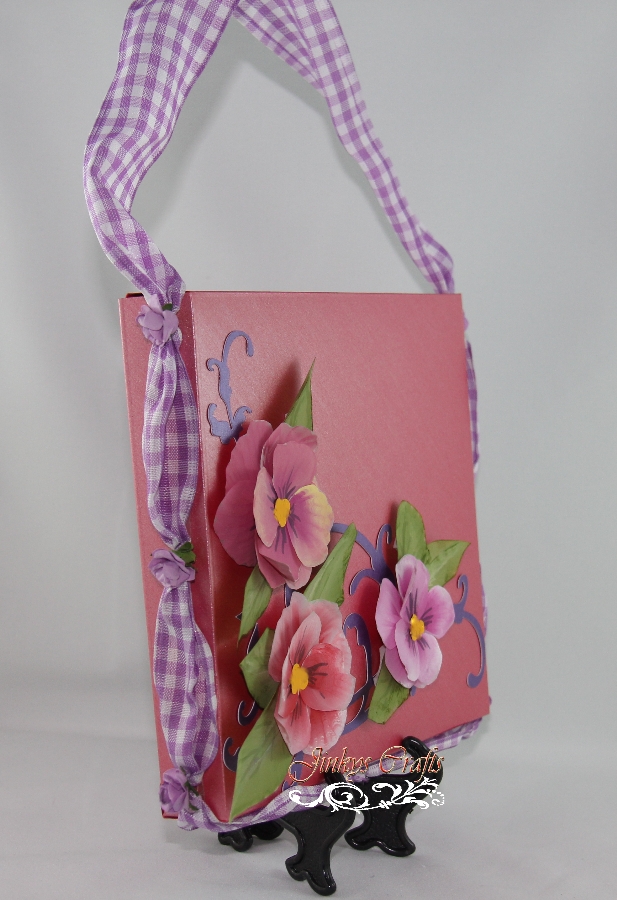
I created the perfect casing for this beautiful Humphrey Window Card. I used my new Envelobox Creator Board to create the Envelobox Hand Bag. This is 1" deep and it is the perfect depth for my 3D Card. I used 11¾" x 11¾" cardstock here. You can certainly go deeper than 1", just use a larger size of cardstock. You can download the Envelobox Creator Sizing Guide here and the demo video here.


I attached a ribbon to serve as the handle around my Envelobox Hand Bag. I hand painted Pansy Flowers on a Vellum Paper using the latest Sheena Douglas Paint Fusion stamp set and these are used to adorn my Envelobox Hand Bag. You can scroll down below for the Painted Vellum 3D Flower Tutorial.


The new Sheena Paint Fusion stamps will be available at Crafter's Companion website on June 30th. Also, stay tuned for the Sneak Peek of these Stamp sets. These stamps will make a great addition to your collection. 


If you use a stylus or round object to shape your flower petals, it will give that extra dimension which makes your flower looks more realistic. I do not have a wide round stylus so I used the ribbon peg of the Ultimate Pro. It works great!


Since I was working with Vellum, I used the Collall 3D Kit for building up my flowers. This is a transparent silicone glue that dries as thick as it is applied, which makes it ideal for 3-dimensional creations.


Painted Vellum 3D Flower Tutorial 
Click Image to enlarge.


Thanks a lot for stopping by. I hope you like my projects and that I inspired you today!  -  Jinky

Monday, June 6, 2011

3D Lollipop Box

Hi Folks, It's Jinky here, hoping everyone had a great and well rested weekend. Let's start your Monday with this cheery inspiration. This is my take on the 3D Scene Card & Box from the Ultimate Advanced Construction Techniques DVD by Crafter's Companion. I created this 3D Lollipop Box as an inspiration project for Crafter's Companion Challenge for this month. It's perfect to house my Marshmallow Lollipop, isn't it? This is when great gift packaging becomes handy. It makes those ordinary gifts extraordinary. 


The Ultimate Advanced Construction Techniques DVD is really a great inspiration for making gift boxes. I just love that it is crammed full of crafty tutorials for advanced techniques, using the Envelobox Creator and Boxer boards in conjunction with the Ultimate Pro. 
Sara Davies- founder of Crafter's Companion and creator of the Ultimate-Pro takes you through this abundant list of step by step tutorials for papercrafting techniques. She starts with the beginner sections that will help you through the fundamental principles of using the two boards for measuring, scoring and embossing.  And then it progresses to more advanced tutorials where your imagination is really challenged.


I just love how my summer project came out. I used Pearlescent Bright cardstocks and decorated my 3D Lollipop Box with the S.W.A.L.K.3- Thank You Stamps and Fairyopolis Card Making Kit. I added a coordinating ribbon on the lid and a Carnation Crepe Paper Flower as my box topper. You can find the Crepe Paper flower tutorial here. 


Hope this 3D Lollipop Box inspires you to do some cool summer projects. 
Now, it's your turn to show what you can create with Crafter's Companion wide range of products for a chance to win the Crafter's Companion Summer Challenge for the month of June.


Thanks a lot for stopping by. Hope you have time to try this technique. Happy Crafting! - Jinky


Thursday, June 2, 2011

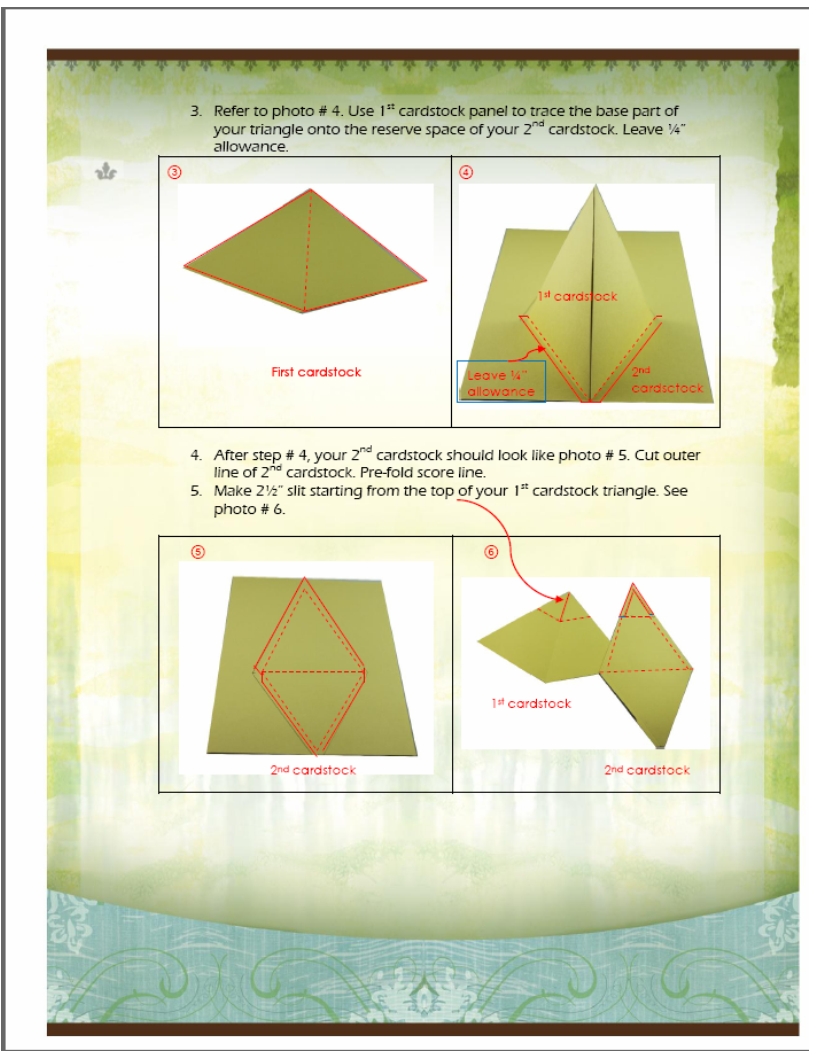
Triangular Flower Vase Tutorial

Ahhh, It's  June already! I can't believe that we are already half way through the year! Time flies, so let's spend time on learning more every second and gaining experience to be a better Crafter! 


I love Summer 3D projects that are functional. So, today,  I would love to share with you this Triangular Flower Vase I made using the Crafter's Companion Ultimate Tool. This is a very easy project that you can use to adorn your party, office or home. It can be a great Teacher's gift and birthday gift as well. 


I am really happy how my project came out. I did this beautiful flower arrangement in just an hour. Can you believe that?  And don't you just love my Carnation Flowers made of crepe paper? Please stay tuned for the tutorial on how to make this beautiful carnation flower.

The added sentiments and my Fairy Flower Topper from the Fairyopolis Card Making Kit are just perfect for my Triangular Flower Vase. Love it!


For those who purchased my 12 Days of Handmade Christmas Crafts, this is another great idea for you to use your template of the Triangular Christmas Gift Box that was included in the E-Book. 

Triangular Flower Vase Tutorial 

Click Image & magnify to Enlarge 

Click Image & magnify to Enlarge

Click Image & magnify to Enlarge

Thanks a lot for stopping by. Hope you have time to try this technique. Happy Crafting!


Saturday, May 21, 2011

Treat Box + Treat Bag + Card ( 3-IN-ONE)


This Tutorial was included on Jinky's Crafts 12 Days of Christmas Crafts 
(Revised 1st Edition)
This will be at the top of the post until May 31st. 
Be sure to scroll down.

Hello everyone! I hope you are enjoying your weekend and you have some time to do crafts. Today is my scheduled blog post for Crafter's Companion and I have a very cool project I would like to share with you. It is a 3-IN-ONE project that only uses ONE 12" x 12" piece of cardstock + embellishments. Also, I will be sharing a Pin-Wheel Rosette Tutorial, using the newly launched Boxer boards for the Ultimate Crafter's Companion Tool. I have made a Pin Wheel Tutorial in the past using the Ultimate Tool. I was happy with the Ultimate Tool before, but I was hoping they would come up with some new boards with equal interval grooves. So, I was ecstatic when I learned that they would be releasing 2 new boards - The Boxer and Envelobox Creator. Yay!


My project is a combination of a Treat Box + Treat Bag + Card in one. I discovered this by accident. I made a mistake in cutting one of my cardstocks and didn't want to throw it away.  So I came up with the idea of making a Treat Bag and combining it with the Treat Box and Card. It worked! Don't you just love it when you try to cover a mistake and you come up with a totally unexpected and awesome end result. I love it! I love making boxes, and not only ordinary boxes. I always want to challenge myself to think outside the box (excuse the pun), and to experiment. The goal? To make an ordinary box, extraordinary. Having the right tool is the key. And if you love making perfect boxes like me, the Crafter's Companion Ultimate Tool + The BOXER and ENVELOBOX boards should be on your MUST HAVE list.


I adorned my Treat Box with 3D Die-cut Decoupage and Rub-Ons stickers from the Fairyopolis Card Making Kit. I filled it with Dove Chocolates and some Mini Rose flowers. Sometimes every little detail counts.
I then put some Ghirardelli chocolates in a clear plastic Treat Bag. I tied a ribbon as a handle  between the Card and the Treat Box. 
I decorated my Card with Pin-Wheel Rosettes that I made with the new BOXER board. Please see below for the tutorial on how I made them. 

PIN WHEEL ROSETTE TUTORIAL


Check my Jinky's Crafts Website for more Pin Wheel Rosette Projects. 

Thank you for stopping by. If you like what you see, please leave me a COMMENT. I LOVE reading COMMENTS! 


Thursday, August 12, 2010

3D Cards - I am back!

It's been awhile since my last post.  My husband and I are visiting family and friends in Canada. We have been living in Latin America for a year and summer is the best time to have a vacation in North America. We were not around during the Winter Olympics, so there are lot's of changes in Vancouver since we left.

At the moment, we are in BC Interior. It is beautiful here, especially during the summer. Apples are starting to ripen. We just missed the Cherry season. I will be posting some pictures soon.

Before we came up to Canada,  I finished some 3D Cards.  These were meant to be entries in the 3D Tuesday Challenge in one of the groups I recently joined. I was not able to submit these cards because we were so busy packing during our last days before our trip.


For this 3D card, I used the Decoupage Paper Napkins technique for the bird as my focal point. I attached printed/designer napkin tissue on a chipboard. I used  Mod Podge as glue and Matte Finish. I framed my decoupage art and I embellished my card with ribbons and some charms. For the sentiment , I used the K and Company sentiment stickers.


For this card, I used Cricut Expression for the leaves.  For the border, I used the Martha Stewart punch .


I embellished this 3D card with Prima Flowers. I used a rubber stamps for the sentiments. Stay tuned for more projects, tutorials and news to come.

Thursday, July 1, 2010

Brayer Technique


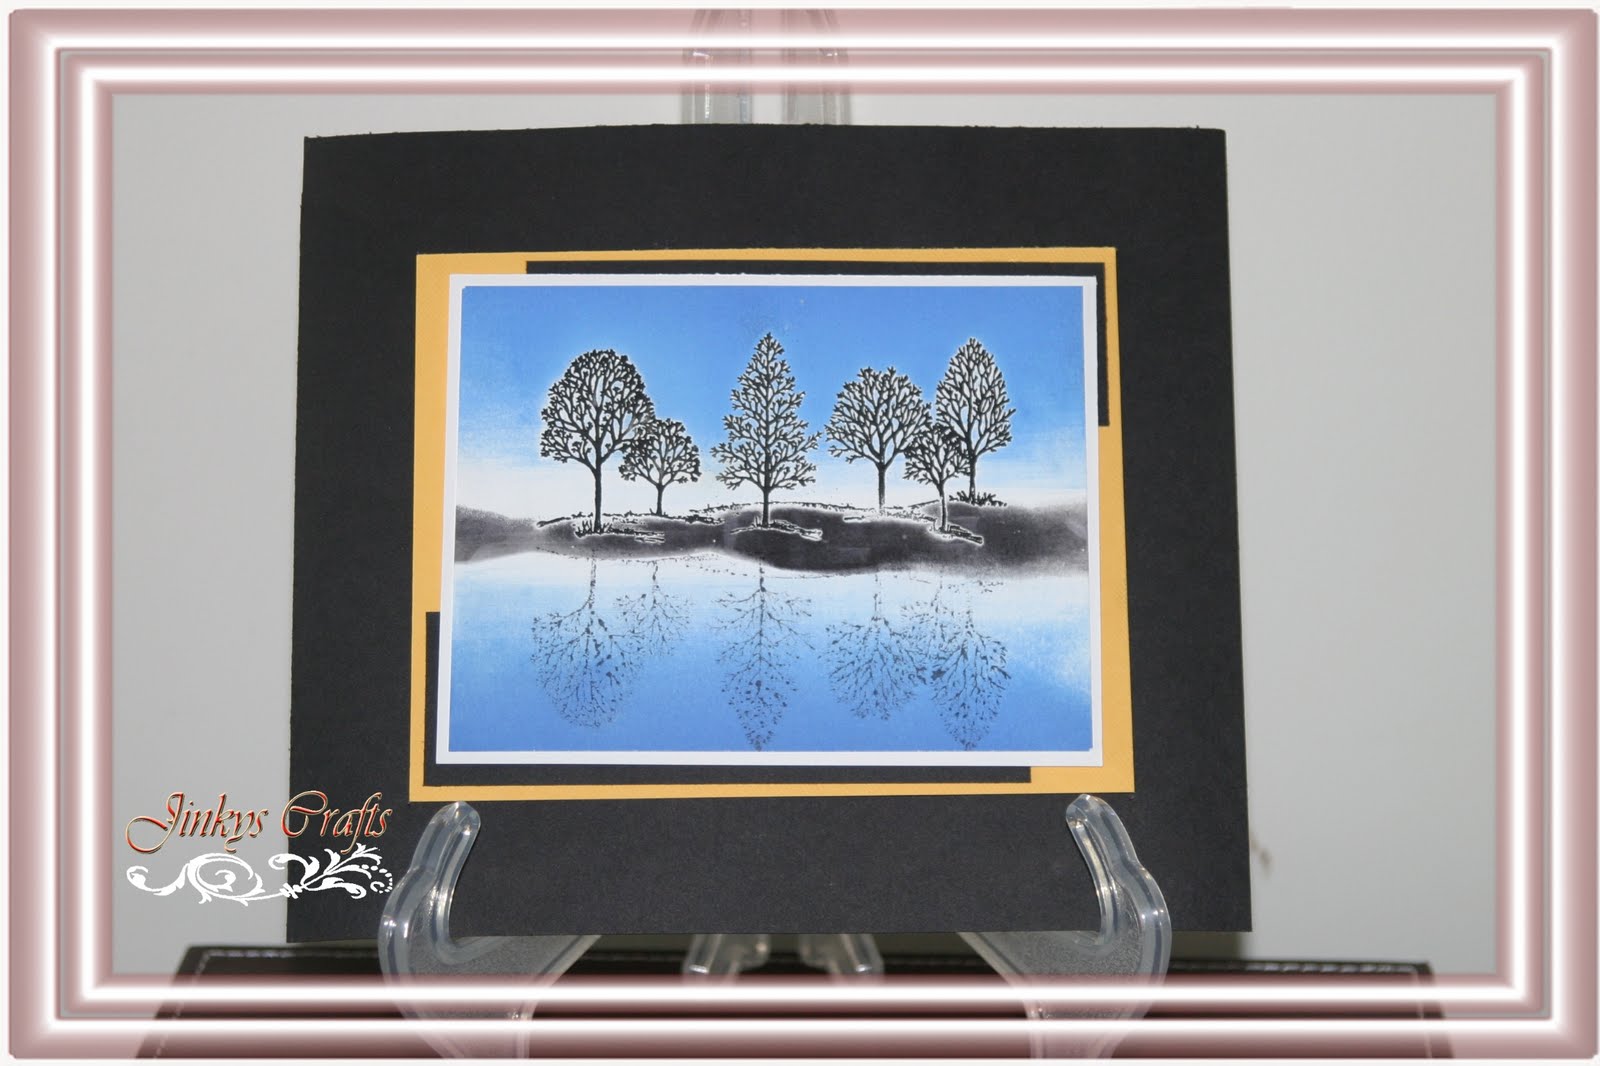
The Brayer Technique is totally out of my comfort zone. I have had the Rubber Roller Brayer for a long time but have not tried using it until now. I finally had the courage to just go for it. So here is my first finished project using the Brayer Technique.  In this project, Reflection/Mirrored Effect Technique was also used.

For those that do not know what a brayer is, a Brayer is a tool that is used in applying ink. It  looks like a miniature paint roller and is very popular in rubber stamping.

It is normally used in creating backgrounds. You can create a solid background if you ink the brayer with one color or create a multicolored background by using more than one color.
                                                                                                                                                          

How To Use A Brayer 


Supplies/Materials:

Rubber Stamps

cardstock

ink pad

rubber brayer

Directions:

Apply ink to your Rubber Roller then roll it on your cardstock or paper in one direction  or roll back in forth, slowly changing the directions to blend the colors. Brayer Technique is great in creating landscapes, you can achieve this my masking off part of the card with torn paper. Color gradations will add more dimension to your project and gives a more realistic effect.

TIPS: Store your brayer rubber side upright in an airtight, plastic storage container.

Happy 4th of July

I cut the 4th of July text using Cricut Expression. I used the Plantin SchoolBook Cartridge. And applied the Brayer Technique in creating the background.


Please leave me a comment below if you like what you see. I want to know what you think.

Related Video