Showing posts with label Christmas Cards. Show all posts

Friday, December 7, 2012

Flashback Christmas Shop Card

Happy TGIF Crafters! I was looking back of my projects last year and I just can't help to RE-SHARE this Christmas Shop Card. We all know that one of the aspects of Christmas is gift-giving, and some people start their Christmas shopping  early or like me and my husband.. we always do last minute shopping. LOL!


This S.W.A.L.K. Shop Till You Drop stamp set is so cute! Look at her, isn't she adorable? I bet you want to go shopping like her right now. Lol! I remember, I really enjoyed making this project last year.  Although, it took me longer than I expected to finished it. Actually, I spend more time looking and looking and looking at it! I just want to get the results exactly the way I envisioned it. I have to say thank you to Penny Duncan for sending me her Christmas Shop Cutfile. The Christmas Shop background and the SWALK image is a perfect combination, don't you think? 


Thank you for stopping by. Hope I inspire you today! 

Sunday, December 2, 2012

Easel Scene Christmas Card

Hello Crafters! Christmas month is here!!! Are you done with your handmade Christmas Cards? If you are like me and just starting, I hope this Easel Scene Christmas Card will inspire you in your handcrafted card-making. 


I used different techniques here. This is a 6 x 6 card, I center-folded the front side and adhered my cut-out window/door. Then, I made a ribbon wreath and attached a die cut Santa Claus. I enhanced the color of my die-cut Christmas Tree using markers and then used "Stickles" glitter and gold trim stickers to decorate my tree. 


I added 2 secret pockets where I could write my Christmas Greetings sentiments. 
I love the final result. I bet the lucky recipient of this card will be happy to display it. 


Ok, that's it folks! I hope this Holiday Card inspires you . Please check my E-Books and Free Tutorials on my blog

Tuesday, November 6, 2012

3D Christmas Card + DIY Cupcake Packaging

Hi guys! After launching my 12 Days of Christmas Crafts Tutorial E-Book yesterday, all I wanted to do was relax. The good thing about your hobby being your business is...you don't know you are working. So, I dug out my Christmas stamps and designer papers and started making Christmas cards.

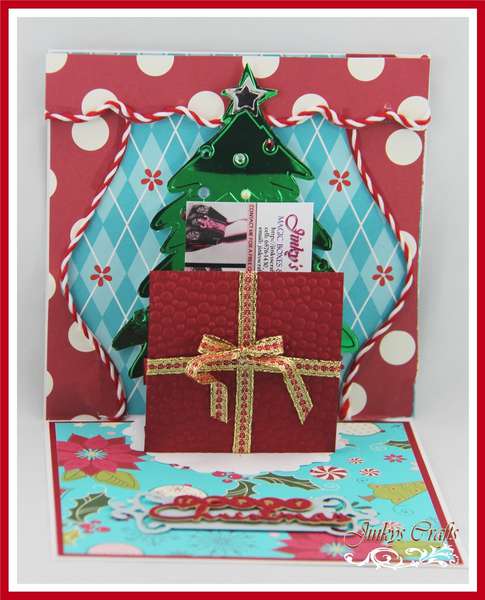
Christmas Side Step Card
Here's a Side Step Card I made. See, if you are like me that wants to shoot 2 birds in one stone.. this design is cool. It's a way to give someone a Christmas card, plus you can showcase your business cards and plug your company. Because, you know, the recipient of your cards will be displaying your handmade card you sent them. If you have an Etsy store, this Side Step Christmas Card will be perfect for you.

3D Holiday Card
This 3D Christmas Card is very easy to make. I really like using Rub On Stickers in my cards because I am very messy when I do my projects.  So having a ready made image full of colors and details like stamping is a breeze when making cards.

3D Christmas Card


Ok, these are flashback projects from previous years. I am re-sharing them to you again so maybe you will get inspiration from them.


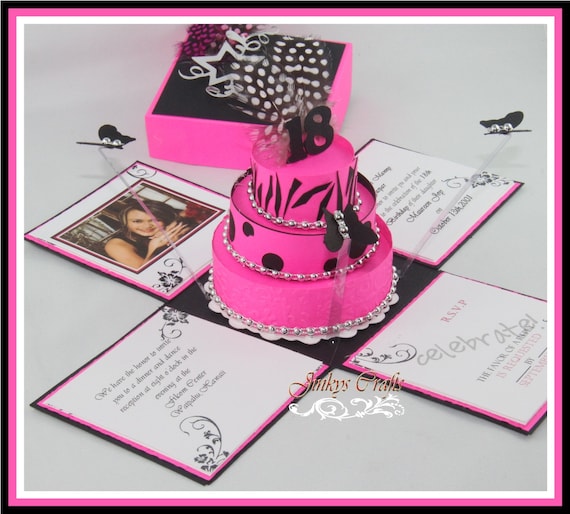
Exploding Cupcake Purse - Closed (2nd Edition E-Book)

This  Exploding Cupcake Purse can surely turn your gifts extraordinary. This specially embellished Exploding Cupcake Purse will hold your cupcake in place and will allow you to give away your baked goods in style. Having this DIY Cupcake packaging will give a personal touch to your giveaways. And you can be sure your guests will be very thankful for the wonderful gifts they received.

Handmade Cupcake Packaging 

The  Exploding Cupcake Purse template is very versatile, I used the same template in making these invitations for a Quinceañera/15 Años/15th Birthday client from New York.

Unique Purse Invitations
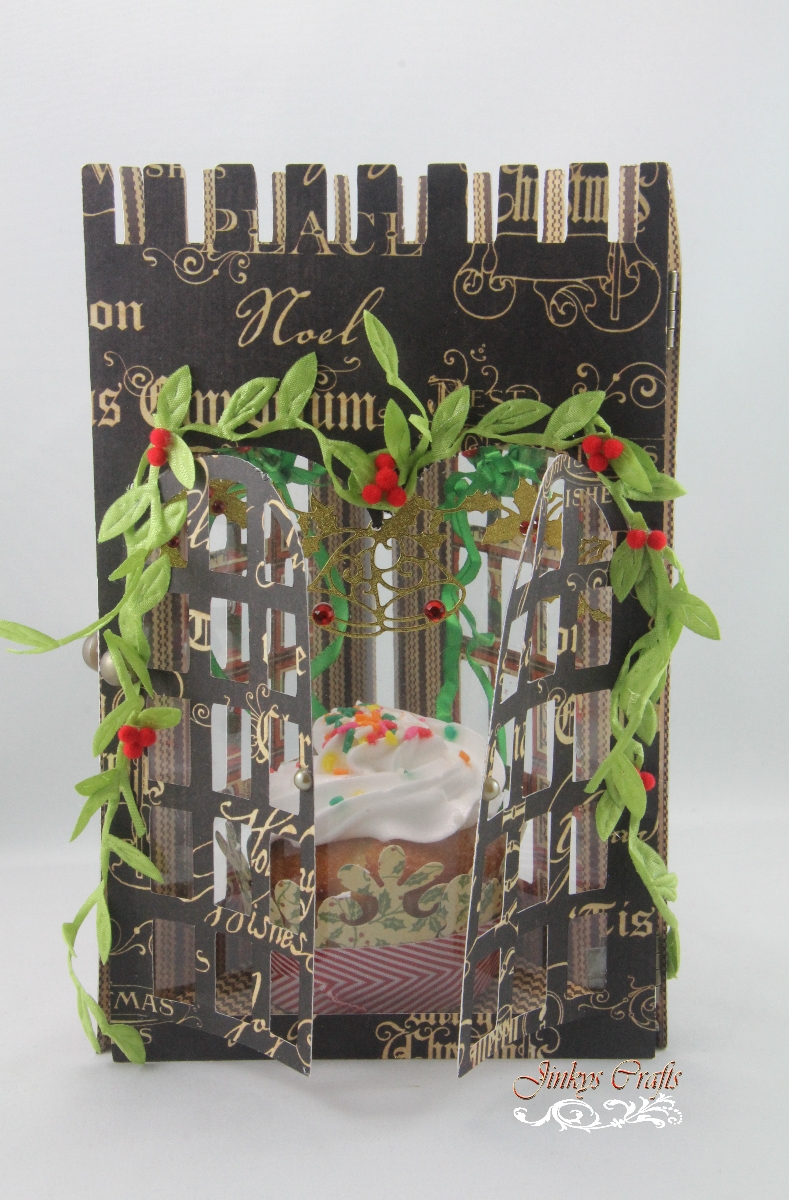
I had a blast making this Multipurpose Holiday Window Box  last year for MayArts blog hop. My inspiration was a combination of my Window Gift Box and Chocolate Tower Box from my 12 Days of Christmas Crafts E-Book


When you are gifting, they always say..it is all about the packaging! This ordinary cupcake looks extra-ordinary and anyone who receives such gift will feel extra special. 

All sides of Multipurpose Window Gift Box


So, after eating the Cupcake, this Christmas Gift Box can also be used as a Christmas decoration. That's why I call this project a Multipurpose Holiday Window Gift Box


Look at my floor, does that not look like a real tile? That's from G45 Christmas Emporium Paper Pack. Also my 3D Christmas Tree, it does not need so much decoration because the G45 Christmas pattern paper is enough. Love it! With the right paper, you can create Papercrafts more realistic.


 Holiday Window Gift Box


I love to read comments too, so please don't forget to leave some LOVE! THANKS!


Thanks a lot for stopping by. Please stay tuned for more Holiday projects to come. 

Thursday, November 3, 2011

Painted 3D Thanksgiving Card

Happy Thursday everyone! Today,  I have a 3D Card I would love to share with you. When I got my  Sheena Douglas Paint Fusion Christmas Stamp Set Collection, I was so thrilled to try them all. Lot's of ideas is floating in my mind. But since Thanksgiving is just around the corner, I decided to make a Painted 3D Thanksgiving card.


Please don't be intimidated with Painting stamp image. Paint Fusion Stamp set comes with a practice sheets. You can practice to paint on the practice sheets first before you paint your art. I have no painting background, but I am happy with the result of my Paint Fusion project. The Paint Fusion stamps really helps a beginner like me. 


This Clean and Simple Card is very easy to make. I stamp and painted  2 cardstock with the same image, then cut image outline of the other one, added some foam dots and attach on top of the card image. Voila! you got your self a painted 3D Card. 

I only used 3 color of my acrylic paint here. Dark green, light green and white. 

You can practically paint anything using these Paint Fusion Stamp set. I just love these new Christmas Stamps Collections of Sheena Douglas, it is perfect for making holiday gifts this season. 


Please don't forget my  12 DAYS OF CHRISTMAS 2ND EDITION is now AVAILABLE! 


Get it HERE

Thanks a lot for stopping by. Hope I inspire you today!

Thursday, October 20, 2011

Pop-Up Gift Card Holder - Day 9


Are You Ready to Become the Talk of All Your Friends with the Most Unique Set of Gifts They have Ever Seen?


Hey Folks, We are on Day 9 of my 12 Days of Christmas Handmade projects. I decided to include a gift card holder in the E-Book because everyone loves to give gift cards during Christmas. And you know me, I love Pop-Ups. That's why for Day 9 we have Pop-Up Gift card holder.


Pop-Up Gift Card Holder

This card holder is not only limited to Gift Cards. You can also put money or even business cards. It is a nice and unique promotional item too, like for coupon or tickets.


I know that some of you are excited about the release of my 2nd Edition of 12 Days of Christmas Handmade Crafts. We are now on Day 9 so that means there are 3 more projects to go before the release date.

Thanks a lot for stopping by. Please stay tuned for more Holiday projects to come. 


Fun Fold Christmas Card with Secret Pocket

I am so excited to share this Christmas Card project with you using the new  Humphrey Christmas Stamps Collection set. I forgot how much I love to make cards. I am into making boxes lately so when I received these sooo cute Humphrey Stamp sets, I knew I had to make a card.
This Fun Fold Christmas Card with a Secret Pocket is so easy and fast to do. Please scroll down below for the dimensions and instructions on how I came up with this cute card. The images of the new  Humphrey Christmas Stamps collection are so awesome that you can make a lot of Christmas projects out of them.
I colored my images using copic markers and used some glitter to get that snowy look. I used gold stickers and colored the inside part of the outline. 
The How to: 
1. Cut 5" x 12" cardstock . 
2. Using the inches side of  The Boxer board, score @ 1, 2, 4 , 6 and 9. Fold score lines in accordion style as shown below.
For the card
3. Cut 4¾" x 5" cardstock.
4. Score at ¼" on one side & cut half-circle at the opening part.
Secret Pocket
5. Fill pocket with tag for your message. Attach to the back part of your card. Done! 
Humphrey Fun Fold Christmas Card


Thanks a lot for stopping by. I hope you LIKE my projects and that I inspired you today! 

Tuesday, December 7, 2010

Christmas Card Sketch Challenge

Here's my take on this week Sketch Challenge at Paper Craft Planet Community.

Sketch Challenge: sk120410

by JESSICA FICK on DECEMBER 4, 2010


I play with the Sketch a little bit. Here's what I came out with. 


Please check my 12 Days of Christmas Handmade Crafts Idea E-book for some unique Do It Yourself Gift Tutorial. 

12 Days of Handmade Christmas Gifts - Click Here for the Tutorials


Monday, November 15, 2010

12 Days of Handmade Christmas Gifts - Day 11 (Christmas Ribbon Wreath Cards)

One more day and the 12 Day of Handmade Christmas Gifts Tutorials are out! 


On the 11th  day of Christmas, my true friend gave to me.

A Trio of Christmas Ribbon Wreath Cards


Who says that sending a special handmade greeting card at Christmas needs to be costly? These three designs of Christmas Ribbon Wreath Cards are easy to make. They sure look elegant and expensive but since I use the Ribbon Wreath as focal point, there is no need for additional embellishments.


For this Christmas Ribbon Wreath with the faux door, I only needed one color of cardstock. To get that distressed look,  I sponged around the edges of my faux door and panels with a chocolate brown stamp pad. The door handle is a black crystal. 


This clever Christmas wreath is made from  weaved ribbon. I weaved this ribbon while watching TV and made it into a wreath. With the addition of red crystals and an accent ribbon, this card looks extra ordinary and is a gift that anyone would be happy to receive and display. 


I  love this Popout Star Card. It looks very elegant, but all I did is embossed my accent paper and created a Popout Star inside the card. 


This is another version of a door and another good project. All I did differently in creating the panels is to cut it out using a craft knife. For this card , I experimented to use a tri-color ribbon to make the Christmas Wreath. I really like how it turned out.  


 You can also check my previous postings for 12 Days of Handmade Christmas Gifts below.

1st Day of Christmas - Japanese Chocolate Box
 2nd Day of Christmas  - Tower Chocolate Box 
3rd Day of Christmas   - Triangular Gift Box
4th Day of Christmas  -  Three Kings Gift Box
5th Day of Christmas - Christmas Cards Galore
6th Day of Christmas - Multipurpose Gift Box
7th Day of Christmas -  Cube Christmas Gift Box
8th Day of Christmas -  Easel Card with Drawers
9th Day of Christmas - Dangling Christmas Tree Card


12 Days of Handmade Christmas Gifts - Click Here for the Tutorials


Thursday, November 4, 2010

12 Days of Handmade Christmas Gifts - Day 5

Are You Ready to Become the Talk of All Your Friends with the Most Unique Set of Gifts They have Ever Seen?


On the 5th  day of Christmas, my true friend gave to me.

A Christmas Cards Galore

 You can also check my previous postings for 12 Days of Handmade Christmas Gifts below.


Framed Christmas Card


I like clean and simple. The focal point for this card is the Pine Cone Paper Flower that I framed in the center of the card. I used a designer cardstock for the Pine Cone Flowers.  I will provide the tutorial and template of the Pine Cone Paper Flower on the 12th Day of Christmas so please stay tuned.  


TIPS: You can create fantastic florals by experimenting with other types of paper, such as crepe paper, patterned paper, book pages, maps, napkins, and more. 


Snowflake Christmas Card


I love the color combination of this card. The different shapes and lines completes this card.  I just added ribbon and rhinestones as embellishment. 


Whimsical Snowman Card


The colors, lines and shapes of the designer cardstock used here is very cheerful. This whimsical  holiday card is just pure fun to make and to receive!


With the Christmas tag that had a hand stamped Special Delivery sentiment, this happy snowman sends the best and cheerful holiday greetings.


Striped Christmas Card

The lined and striped patterned papers set the tone for this winter wishes card. I used a peel off sticker to add some shapes on the card. I used coordinating cardstock for the border and I created my own stripe by simply making red lines using a gel pen.


I hand stamped the winter wishes sentiment and also created a 3D Christmas Tree that I cut out, also hand stamped. Then I added some buttons to embellish the card. 
Zipper Star Christmas K- Card


This card is inspired by a new fashion trend these days- The Zipper. You can see them on almost every fashion items like clothes, bags, hair accessories and so many more. Why not take your holiday projects to the trendy level using this inspiration- the ZIPPERS!  

Creating this 3-dimensional Star with the Zipper wrapped around it is a great focal point on this K- Card Christmas Card. All you need to do is add Christmas Sentiments and you will come up with a unique trendy card. 

A tutorial of how to make a K-Card will be available on the 12th day of Christmas. 


Handmade Christmas Gifts - Click Here for the Tutorials