Showing posts with label fabric flowers. Show all posts

Wednesday, March 28, 2012

5 Favorite Fabric & Ribbon Manipulation Project

Hello everyone! Hope everyone is having a great day! I have been seeing a lot of beautiful and vibrant fabric flowers and ribbon manipulation projects in Pinterest recently. I decided to share with you my 5 Favorite projects I made using fabrics and ribbons.


5 Favorite Fabric & Ribbon Manipulation Projects by: Jinky's Crafts

1. Kanzashi Heart Wreath - I created this project for MayArts DT Challenge. I consider this as one of my top favorites because this project gave me the chance to be one of the talented MayArts Ribbons Designers. 


2. Ribbon Art Canvas - This is a project I created to showcase MayArts Ribbons & Stampendous Big Floral Peony Stamps. Great project for home decor. 

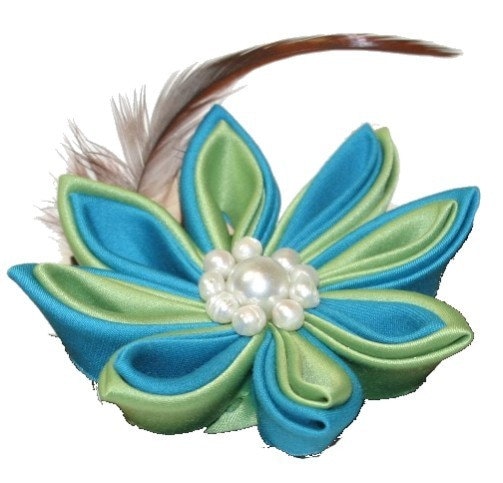
3. Kanzashi Fabric Flower -  I made this colorful fabric flower jewelry for my sister-in-law. There should be free tutorials on how to make the Yo-yo and Kanzashi Flower if you click the link. 

Kanzashi Flower Handmade Jewelry

Tsumami Kanzashi Flower + 2-Way Cube Gift Box

4. Gathered Ribbon Flower  - This gathered flower is so easy to make. Just make a straight stitch on one side of the ribbon and then gather the stitch and form into a flower. 
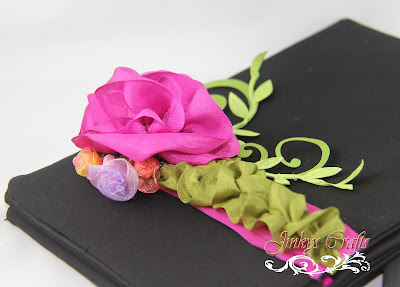


5.  Spider Web Ribbon Flower technique - I enjoyed making this Framed Ribbon Flowers project. I learned few ribbon manipulation techniques in making this beautiful ribbon flowers. There should be a free tutorial for the Spider Web Ribbon Flower technique on my linked post. 


r
Spider Web Ribbon Flower + Exploding Box


So those are my 5 Favorite flower manipulation projects. Please let me know your favorites too, or if you have a flower tutorials you want to share..just let me know,  or leave a comment. Thanks for stopping by today!

Wednesday, January 4, 2012

Elegant Matchbox Dresser Drawers

Happy New Year everyone! I can not believe it is 2012 already, where did 2011 go!?!

Today I have a mini storage and organization project for you. Just in time for those New Year's Resolutions to get organized this year. You might have seen several versions of Matchbox Dresser Drawers already but when I received my DCWV Lemon Flowers Paperstack, I knew exactly what I was going to make. 


As you can see, my Matchbox Dresser Drawers were decorated with the DCWV Lemon Flowers Paperstack. I love these paper collections, the combination of yellow and silver is very elegant. If you noticed, I also used string of bling around my dresser with the aid of Helmar Quick Dry Adhesive. I also used the Helmar Acid Free glue in adhering the DCWV paperpacks. It's my first time to use Helmar but I found it works great. It has a self-cap option. I don't know about you but I hate looking for caps once I am done using my glue. 


I also used the Zapdots 3D Double Sided Adhesive for my 3D Faux Flower Bouquet. 


I even made an ornament adorned with gathered MayArts ribbon. And a Kanzashi Flower Pearl Bracelet. Again, I used Helmar Quick Dry Adhesive to attach my pearls to my Kanzashi Flower. This glue is super strong and dries clear and works really good on fabric/ribbon. I used MayArts ribbon for my Kanzashi Flower.


How I did my project?
You can find the Step-by-Step PDF Tutorial for the Matchbox Dresser Drawers here.  

  • For the ornament: Die cut ornament shape. I used a Spellbinder die
  • Die cut gathered ribbon
  • Adhere ribbon to ornament using Helmar Quick Dry Adhesive
  • For the 3D Flower: Cut out flower from the DCWV Lemon Flowers Paperstack
  • Layer the 3D flower using the Zapdot 3D foam adhesive
  • For Kanzashi Flower: Cut 2"x2" square MayArts Ribbon. Fold in Kanzashi form. My previous tutorial can be found here. For Tsumami Kanzashi Flower you can check my Etsy Shop  or auto download link here.
  • Glue pearls Helmar Quick Dry Adhesive
  • String pearl beads. Adhere Kanzashi ribbon flower. Done!


Thanks a lot for stopping! Hope I inspire you today! 

Wednesday, September 14, 2011

Fabric Flower Chocolate Bouquet - Day 3


Are You Ready to Become the Talk of All Your Friends with the Most Unique Set of Gifts They have Ever Seen?


Are you guys ready for DAY 3 of the 12 Days of Christmas Handmade Crafts. For those who follow my blog you might already know that I am learning new kind of craft. It's fabric/ribbon manipulations, that's why my blog is called Cloth, Paper Crafts and more..

Fabric Flower Chocolate  Bouquet
Fabric Flower Chocolate  Gift Set
So, those of you who are waiting for some fabric projects and want to add color that is fun and unique, and that lasts forever..this Fabric Flower Chocolate  Bouquet is perfect for you. This bunch of flowers with chocolate buds are the perfect touch to your home decor, it really looks great on an entry table or is a great center piece on your dining table.

Click Image to Enlarge
This Fabric Flower Chocolate  Bouquet also makes for a lush and classy gift to your loved ones this holiday season. It can also be used separately as party favors. Maybe you can even use some of the beautiful Christmas gift boxes that will be included on the 12 DAYS OF CHRISTMAS HANDMADE CRAFTS E-BOOK to package these fabric flowers.

The step-by-step tutorial for this Unique Holiday Gift will be available on the 12th Day of Christmas. This will be included in the 2nd Edition of the 12 Days of Handmade Christmas Crafts E-Book. You can find the first edition here: 12 Days of Handmade Christmas Crafts E-Book 


12 Days of Christmas Handmade Crafts- First Edition
Thanks a lot for stopping by. Please stay tuned for more Holiday projects to come. 

Tuesday, June 7, 2011

Thank You For Your Support

Thank you all for your support on my MayArts DT Challenge. I really appreciate the time you spent in commenting and voting for my final round DT Challenge entry. Without your support, I could not have done it without you. Yes, Folks, my victory is your victory too. I am now officially one of the Prima Ribbonistas of MayArts. Yay!

Note( If you had already purchased this tutorial, you can check my ETSY SHOP and choose one Fabric  Flower Tutorial  as your prize).      


I know I can not thank you enough, but I decided to giveaway some of my Fabric Flower Tutorials as blog candy in celebration of winning the MayArts DT Challenge. I will be selecting 3 winners next Tuesday. All you have to do is to leave a comment below and let me know if there is something you would like me to do as my next project

Note( If you had already purchased this tutorials, you can check my ETSY SHOP and choose one Fabric  Flower Tutorial  as your prize).      


Thank you for stopping by. Hope you have time to play along! 

Sunday, May 29, 2011

Kanzashi Heart Wreath - MayArts Final DT Challenge Entry


This will be at the top of the post until May 31st. 
Be sure to scroll down.


Hey Folks, the MayArts DT Challenge ain't over yet. If you remember, my Framed Ribbon Spring Flowers was selected in the initial round of Finalist for the Design Team Call for MayArts. This Kanzashi Heart Wreath is my entry to the last round Challenge. This time there was no theme.  I hope you like my entry and support me by voting for me. Stay tuned for MayArts official post for the FINAL ROUND entries.


I decided to make this Kanzashi Heart Wreath because I love the art of folding. The Kanzashi term- in the English-speaking world, refers to the folded-fabric-petal flower that traditionally adorned the Tsumami Kanzashi (folded hair ornament). These are created by Japanese artisans from tiny squares of silk, usually 1"- 4". It is folded into petals using origami techniques.


 I really like how the twig (wrapped with velvet MayArts ribbon) gives my butterfly a nice place to rest.  I am actually amazed with all the different types of Kanzashi folding and Kanzashi flowers. In Japan, the seasons dictate which kind of hair ornament is worn. It is beautiful! Please scroll down for the  Basic Tutorial for Rounded Kanzashi Petal.


One of the traditional and main supplies used in Kanzashi flower construction is rice glue. I deviated from the traditional way by hand-stitching instead. This flower petal folding requires a lot of patience, but it is worth it.  I love how my Kanzashi flowers and  Kanzashi Falls came together. The summer colours are bright and cheery. This Kanzashi Heart Wreath will be a great home decor item for summer time.  And by using the tutorial provided below you can make hair accesories like a barrette, hair clip, necklace, brooch and many more..You can see some of my Kanzashi projects here.


All the ribbons used on this Challenge project were compliments of MayArts.


Yellow Flower: HA27
Red Flower: HA14
Pink Flower: HA17
Leaves: KK16
Falls Cord: 378-16
Twig: 389-18-46
Wreath Handle- AGG14


Click Image to enlarge.


Kanzashi Petal Flower Tutorial


Basic Supplies: 

3" x 3" fabrics (6-10 pieces,any size you want)
Scissor
Needle
Thread
Pins

Click image  to enlarge .


Framed Ribbon Spring Flowers -  MayArts DT Challenge 1st Round Entry


Thank you for stopping by. Hope you try this technique sometime. Wish me luck and vote for me!  Hope I will win the MayArts DT challenge.

Tuesday, March 29, 2011

Framed Ribbon Spring Flowers


Finally, my project entry for the MayArts challenge is done~! I am so happy with the final outcome of this project. I am proud to present to you my Framed Ribbon Spring Flowers! Don't you just love how bright and beautiful everything looks in Springtime? I LOVE it! 

 Ribbon manipulation is new to me, but it is a new passion I have developed over the past few weeks. I love how paper and fabric complement each other. 


All ribbons used on this Challenge project were compliments of MayArts. This is my entry for their DT Call Craft Challenge, which had a theme requirement of Spring Flowers. I used the Flat Rose and Spider Web techniques for my roses. I just learned how to do these while working on this project. You can find my Spider Web Fabric Flower Tutorial here.


May Arts Ribbon Used : 

Leaves : SN48
Yellow Rose: HA27
Red Rose: HA14
Pink Rose: HA17
Brown Silk: HA33
Trim: 378-16

For those of you who know me, you probably know by now that I love 3D projects.  That is why I tried to make this in 3D. I cut some butterflies to adorn my Spring Flowers and weaved a basket which I intentionally raised to have that 3D effect.  I leave the top of the basket open so you can add some batting to poof it up or some moss (Sorry,  I don't have any handy). 


This project makes a great home decor this Spring season or a great gift for Mother's Day.  That's why I included a Happy Mother's Day sentiment cut out on the frame. 

This project is very easy. If I can do it being a newbie on ribbon folding, I bet you can to. C'mon give it a try~!

Thanks a lot for stopping by. If you like this post, please consider leaving a comment, SHARE this blog with your friends and colleagues or subscribe to my newsletter. 


Wednesday, March 23, 2011

Fabric Flowers Collection - In Progress...


Here's a sneak peek of the  Fabric + Paper + Ribbon Flowers E-book I am currently working on. I am trying to release the E-book by the end of this month. Everywhere I looked today, I saw fabric flowers! I see them on ladies accessories like brooches, necklaces, fascinators or corsages.  Also, fabric flowers are popular for special occasions and events. Beautiful fabric flowers are usually used on wedding decorations, wedding flowers, bridesmaids bouquets, gifts and even on boutonnieres!

For Ladies Bloom today with fabric flowers brooch, necklace, fascinator or corsage. Flower accessories always were and will be i


 I have seen fabric flowers on Wedding Gowns and on just about every other fashion these days. When I look at them I try to understand or dissect them  to figure out how they are  being made.  And then I try to replicate. Often, I buy fabric flower accessories not because I wanna use them. I usually tear them into pieces, study them and try to make it into my own version. At least it is not an electronics gadget I am breaking into pieces. I am so done from that, from my college days.  lol ! 


I think these Fabric Flowers are gorgeous! They might look easy to some or intimidating to others. But we can all agree that flowers brings cheers to everyone. Whether it is real flowers, or paper flowers, or fabric flowers or ribbon flowers! To me, they all look beautiful! 

Please stay tuned for the release of the E-book. It will be your ultimate resource on flower crafting. 

Tuesday, March 15, 2011

Easter Egg Fabric Flower Bouquet


I love Spring because it is fresh and pretty. Everything is full of color and energy....even me! Today, I found my inspiration in this spring flower bouquet I saw in a magazine. And you know me, I love to challenge myself and find new creative ways to do things differently. Since we live in a high rise building and have no way to have a garden to plant flowers, I decided to create my own garden or make my own flower bouquet. This Easter Egg Fabric Flower Garden/Bouquet allows me to be inventive. It is charming and colorful- like Spring! 

Photo Source : Good Housekeeping

With some fabric scraps and little bit of sewing + the chocolates, you can create a magnificent craft or gift this Easter season. 


The flowers look so much more complicated to make than they really are.  I promise you it is super easy and fun. Check the tutorial here


This is a great project for a bonding moment between mother and daughter, your friends or just yourself. You can use any color or theme you want.  Get the tutorial here

I prepared a tutorial with step-by-step photo instructions on how to make this Fabric Flower Bouquet. You can get your tutorial here


To purchase the step-by-step instructions on how to make Easter Egg Fabric Flower Bouquet, click HERE


Thanks for looking and hope you will try this project. I will be glad to publish pictures of your finished project on my site if you like.


Tuesday, March 8, 2011

Fabric Frilly Flower Using Cricut Paper Template


Photo Source : Newsodrome

My mother-in-law showed me a Flower Frill Paper Template from a Quilt Show she recently attended. I told myself, maybe I can create a Flower Frill Paper Template too using my Cricut. So, today I experimented by making this Frilly Flower using a Cricut 8 Petal Flower Cutout. Here's how my Frilly Flower looked after my experimentation was done. 


I really like how it came out. I think it's beautiful. That's why I would love to SHARE the tutorial to my loyal subscribers and followers. 


Here, I used the Frilly Fabric Flower to adorn my Paper Cake Box. It matches my Cricut cake border perfectly.  


Here's the Cricut Recipe:

For the 8 Petal Flower Template:
Flower3-  Plain Shadow Blackout
cut at 4" 
Note: any 8 petal flower will do

For my cake box border : 

Border9  
cut at 1½" 


This beautiful fabric flower is super easy to make and can be a great brooch, necklace, hair accessory, or as an accent anywhere. Go ahead and try making some Fabric Flowers. You can email me the photos once you are done and I will be glad to feature your project here on my blog and my website. 

Thanks for looking. Please do not forget to join my first Blog Candy Contest. Click here for details.